This video article is part 2 of a multi-part series on the Concept2 rower, with the goal of helping you be faster, more efficient, and safer in your endeavors with the mighty rowing machine. If you’ve not already read/watched our video post on how to properly set yourself up on the Concept2, check that out as we’ll be building on that foundation today.
Video Transcript: When I perform a new client consultation/assessment, one of my favorite places to start with them is on the erg. Not only is it an excellent full body warm-up, but more than any other piece of cardio equipment, it can tell me a lot about the kind of mover they are. I can see elements of mobility (ankles), posture (upper and lower back), as well as simply how well they can assimilate coaching cues, translating into actionable change in their technique on the machine. While the rower is simple in nature, it’s truly exposing in that it requires the rider to be of sound technique to maximize efficiency. That’s what we LOVE about it. Just like a quality Power Clean or Push Jerk, it takes time, focus, and solid technical awareness to truly excel so let’s dig in and get started! The row stroke is divided into four phases: Catch, Drive, Finish and Recovery. Let’s dive into those four phases, showing you how to maximize your effectiveness, making your time spent on the machine work for you and not against you.
Catch:  This position is sometimes called the ready or start position, with the name coming from the point at which on a boat, the blade of the oar would ‘catch’ the water. You’re at the front of the machine, ready to drive and produce force through the feet. “How far forward is forward?” you might ask. We use a vertical shin relative to the floor as the reference point (it’s ok if the heels come up a little…that’s why the foot stretchers are built to flex that way). Along with a vertical shin, it is important that we see a tall torso. Hands ought to be gripped with the thumb around the handle, placed in line with the width of the individual’s shoulders, arms straight. Last but certainly not least we want to lean in slightly, with a tall chest to where the shoulders are just ahead of the hips, or on a clock face, the body is at about 11 o’clock. This is the foundation for a strong catch position and will set you up successfully for the drive phase.
Drive: Now that we understand the fundamentals of the catch and the finish positions, we can talk about the drive phase. It’s important to think about the drive phase simply being a transition from the catch to the finish. The row stroke has three primary mechanisms to produce power. In order they are the legs, hips, and finally the arms. Keep in mind that although the name of the machine is a “rower,” this is a leg dominant movement. Without overthinking it, the legs initiate the drive by begin extending, pushing the upper body away from the front of the rower much like the start of a deadlift breaking the barbell off the floor. Once the hands have transitioned past the feet, the hips start to swing back, moving the torso from that 11 o’clock angle towards the 1 o’clock angle as we discussed in the finish phase above. Finally in the sequence, the arms bend, bringing the handle in towards the torso. 
Finish: 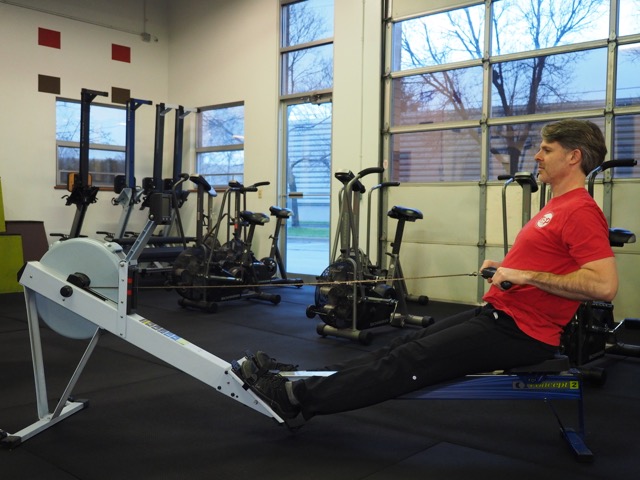 Before we discuss the nuances of the drive phase, it’s important to know where you are headed. The finish position finds us with straight and firm legs, having just been extended all the way. Torso angle now has a slight backwards lean, opposite of the catch position. This lean puts the body at 1 o’clock with the hands pulled in just below the solar plexus. Shoulders are down and relaxed with elbows neither winged out or jammed in at your side. Elbows need to be near the body as if you had a grapefruit between your elbow and your side, with forearms and wrist parallel to the floor. This is the finish position phase of the row stroke.
Recovery: At MSP, we try to keep things simple. I can’t think of an easier way to explain the sequence of the recovery phase than that it’s simply the exact opposite of the drive sequence. Instead of Legs -> Hips -> Hands, the recovery sequence is Hands -> Hips -> Legs. You lead with the hands, or “Hand Away” as we like to cue, then swing the body over back to that 11 o’clock position found in the catch, finishing with the legs bending and returning you to the catch or start. Just like on the drive, none of these steps are done without the previous step. Push hands away, pivot the bodies over, and flex the legs back to a vertical shin. Simply reverse the steps found in the drive and you’ll have a foolproof experience when mastering your recovery. 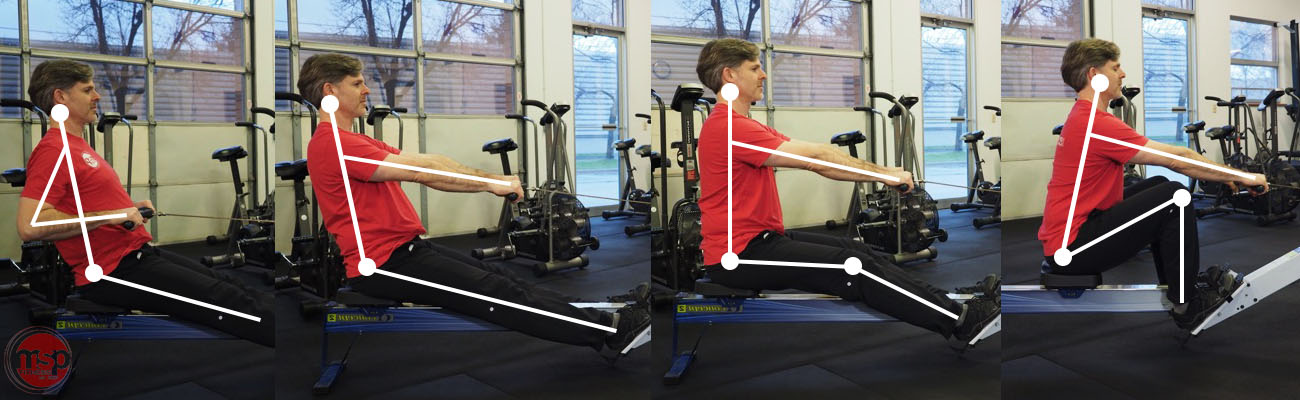
Final notes: When practicing all of the pieces, keep in mind that it is important to initially maintain a robotic-like approach to the row stroke to build the proper patterning. Once proficiency increases, and your movement become smoother, you’ll find a smooth flow to the stroke, feeling like it’s one fluid movement. Always remember that no matter how much intensity you add to your phases, they ought to still be distinguishable and recognizable. Failing to do so will result in an error on the rower, a topic we cover in detail on another posting coming in this series. For now, happy rowing! If you have any questions specific to your rowing challenges, or if you found some success with this tips, join the conversation on Facebook and let us know! -Written by Michael S. Pilhofer