Salty, meaty goodness was a pillar of my childhood. From woofing down beef sticks at sleepovers to consuming smoked delights throughout long road trips, beef jerky has been one of my all time favorite foods. Don’t worry, you need not convince me that beef jerky isn’t a meal unto itself (the dense fog of adolescent nostalgia isn’t THAT thick). Incompleteness aside, smoked and dried meat is a great nutritionally dense option, especially when you’re on-the-go. Trouble is, you aren’t exactly snapping into health when you snap into a Slim Jim. This is why I love to make my own. I can control the spice level, the thickness of the meat, and most importantly the quality of the protein and the marinade ingredients.

Creating beef jerky at home is easy. I’ll show you my marinade recipe, how I dry them out in my dehydrator, and leave you with an oven option that’s just as straightforward. By following these instructions, you’ll have all that you need to master beef jerky in your own kitchen. My hope in laying out these directions for you is to 1) have some nostalgic, meat-based fun and 2) instantly feel liberated from the unquenchable hankering for a bag of Jack Link’s at 3:00pm on a work day (sharing with coworkers anticipated, but never required). CHEERS!
“Beef Jerky” – Gluten Free, Paleo Friendly
Ingredients:
≈ 2 lbs of lean round roast (top, bottom, London broil, etc)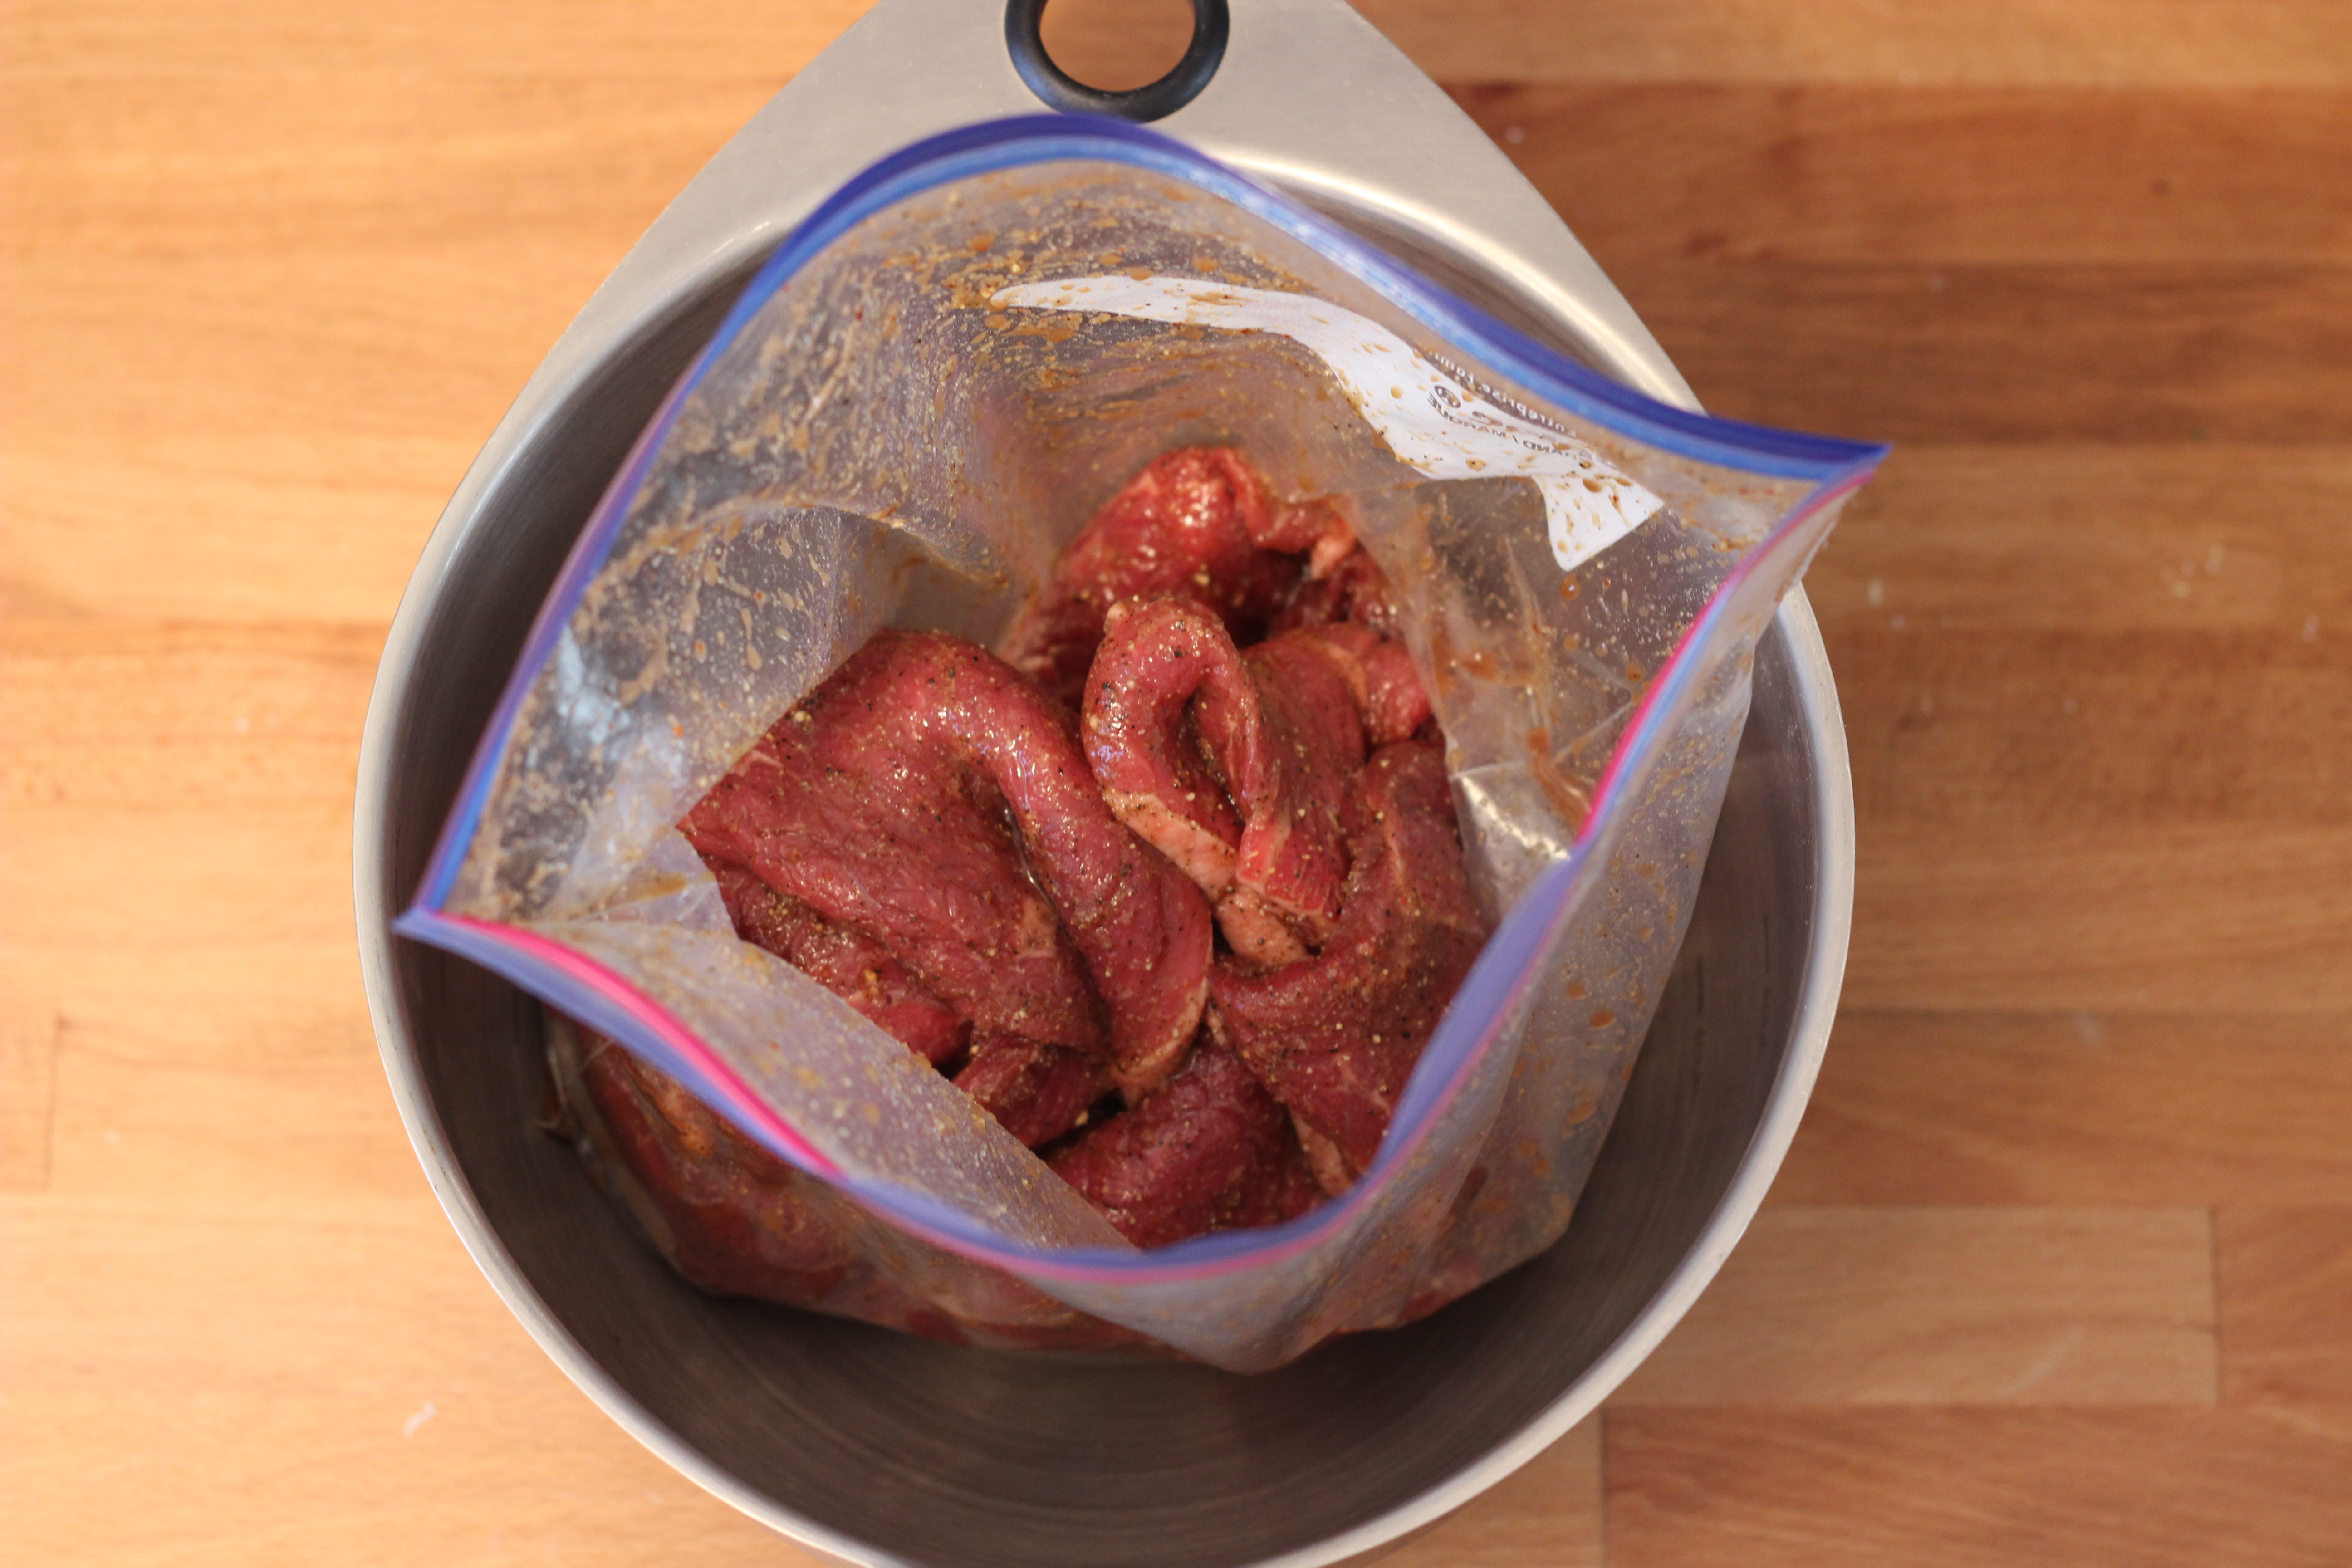
1/4 cup coconut aminos (soy sauce alternative)
2 tsp liquid smoke
2 tsp worcestershire sauce
1/2 tsp apple cider vinegar
1 Tbsp kosher salt
1 tsp fine ground black pepper
1 tsp onion powder
1 tsp garlic powder
Directions:
1. Slice the roast as thinly as possible. I’ve always preferred to slice it myself, however if you’re still honing those knife skills, a butcher will often be happy to slice it for you at the grocer. If slicing the meat yourself, freeze the roast for 10-20 minutes beforehand, solidifying it so that it’s easier to cut thin.
2. Combine the liquid and dry marinade ingredients until well-mixed, then pour over the awaiting meat in a medium bowl. Using your hands, coat the pieces of meat until thoroughly covered. Transfer to a resealable plastic bag and marinate overnight.
DEHYDRATOR method:
3a. Lay the beef pieces out on your dehydrator in a single layer. Make sure to leave some room for separation between soon to be jerky pieces. Set to 155°F and dehydrate between 2 and 5 hours (or until things are no longer “wet and pliable”).

OVEN method:
3a.First, preheat your oven to 170 – 175°F. Then, use a dish towel or hot pad to prop the door open slightly, leaving a crack as to not overheat the drying meat. Those of you already in the market for one, might pick up an oven thermometer to ensure temperature hangs at/round 175°F (not required, but helpful for any oven user).
3b. Inside rimmed baking sheets, place metal cooling racks and lay the marinated meat across the racks, leaving space for the drying process.
3c. Just like with the dehydrator, jerky in the oven can take as little as 2hrs and as long as 5 depending on the thickness and moistness of the meat.
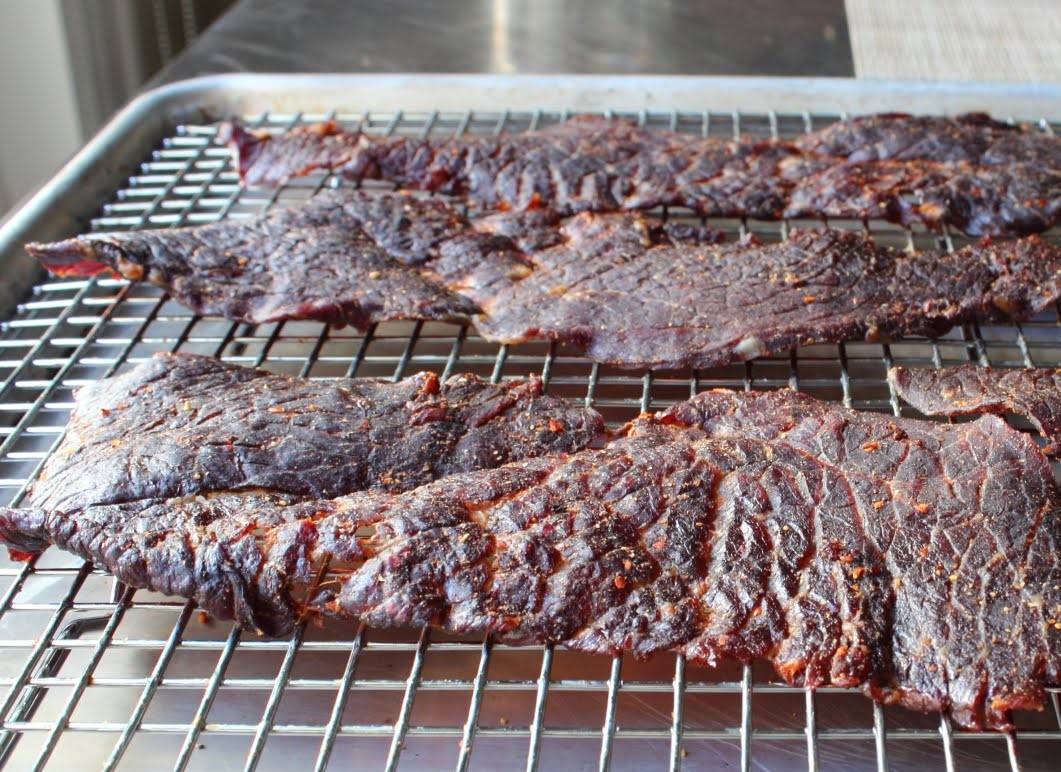
4. Once finished, let the meat rest for 30 minutes and then store in plastic bags lined with paper towels. The paper helps capture any remaining moisture from the fattier parts of the meat and you can remove it after a day. The jerky will stay fresh on the countertop for about a month, or in the fridge for a few months (if it lasts that long!).
Keep in mind that thicker, fattier cuts of jerky spoil quicker so consume with a little more haste than lean, thin pieces. I hope you have fun and ENJOY! In the mean time, join the conversation on Facebook and tell us what you think!

-Written by Taylor Gish
If you like this post on Beef Jerky and are inspired to do MORE in your own kitchen, check out our 7 Tips for Easy Food Prep!