Video Transcript:
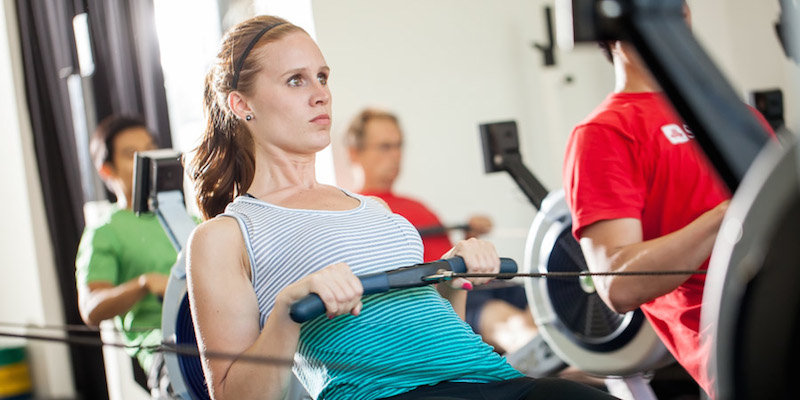
Today we’re going to be discussing rowing. More specifically, how to find the proper set up position on the erg rower.
One of the best things about the Concept2 Rower is that it’s really easy to just get on and go. Unfortunately, this is also one of the rower’s greatest weaknesses. Much like with anything else in the gym, if we have the ability to properly set ourselves up, allowing us to be more efficient, then we HAVE to take the time to do that. This post/video is going to give you the knowledge to help you do just that.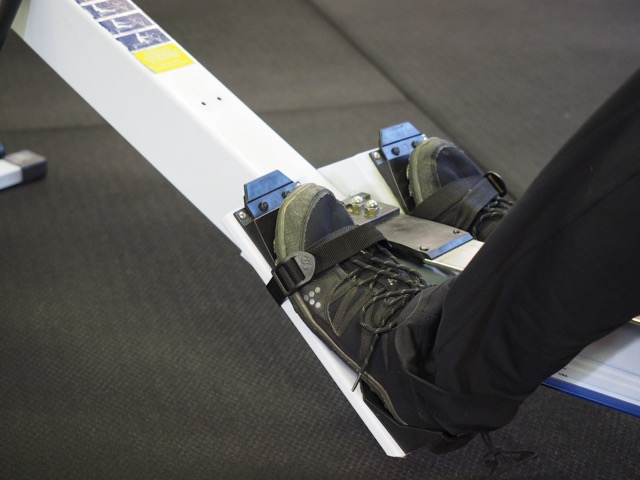
Position of the Feet:
First and foremost, let’s talk about the footbeds. Often forgotten, the straps and pegs where you place your feet are adjustable. With relative ease, we can move the footbeds, aiming for a strap position that sits somewhere around or slightly above the ball of the foot.
The Handle:
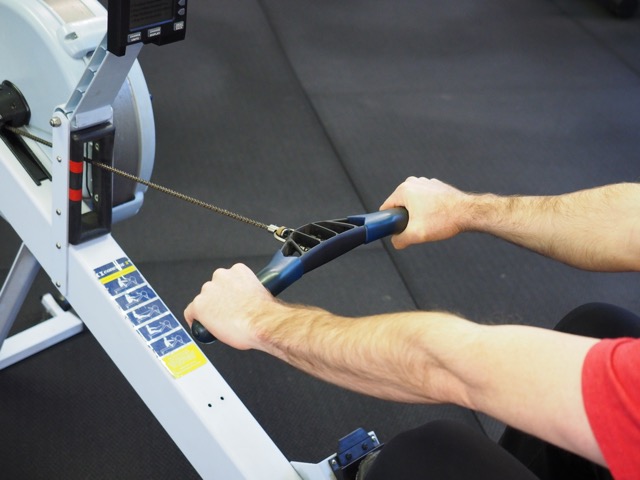 Although one of the smaller puzzle pieces we look to when setting someone up on the rower, you cannot forget to cue proper hand placement. Your hands should generaly be at the widest part of the handle, with thumbs under, so your elbows can easily pass by the torso as you move to the finish position of the stroke. Simply put, this is where your hands would be if you straightened out both arms perpendicular to the body.
The Start Position:
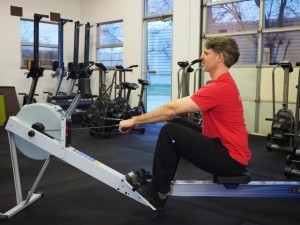 Now that the feet are set and you’ve grabbed the handle, the easiest way to find your start position is to achieve a tall torso, leaning slightly forward so shoulders are just ahead of the hips, with shins relatively vertical to the floor. Looking for the shin and chest markers will place you in the most efficient position for rowing.
In addition to the torso and the shin parameters, there must be a little bit of clearance underneath the forearm, above the knee. For the row stroke to be efficient and effective, we want to see the hands track straight over the top of the knee/leg in both the drive and recovery strokes. Any goofy compensation like knees outside of the forearms, or knees inside the arms are clear indications that we are not properly set up.
One Last Positional Adjustment:
If you’ve surveyed movement for as long as we have, you’ll see that humans come in every size and proportion. Due to this, clients with less than flexible ankles, long legs (in particular long tibias), or short torsos can have a hard time achieving the vertical shin marker and forearm clearance that we want to see. To assist them in achieving an optimal set up, we’ve cut up some old soft mats into squares, and propped them up by sitting on them. Usually two to four mats will give an individual the extra assistance they need, putting them into a taller position and achieving that ideal start position.
Hopefully you’ve had some great takeaways on the start position for the Concept2 Rower. Next time you go for a row, make your life a little bit easier by applying these tenets. We’ll continue this focus on the rower in future BLOG posts on the four phases of the row stroke, along with some common errors.
Enjoy and happy rowing!
– Written by Michael (MSP) Pilhofer