At MSP Fitness our blogs predominately focus on fitness and all things training, yet a key component to nailing your physical preparation is proper nutrition. When we coach clients on nutrition, we take a highly individualized approach to food and lifestyle. That being said, we can unequivocally go on record and state that humans need protein.
If not simply for surviving, you need protein for thriving! Trouble is, animal protein isn’t easy to consume on the fly or at the end of a long work day. You know you need it, but who has the time to make it themselves?
We’ve previously discussed the benefits of batch cooking your protein so it’s ready at a moment’s notice. There are also great companies like EPIC Provisions who are making meat based snacks and bars providing both sustenance and satiety when you’re on the go. But what happens when you didn’t make your week’s protein in advance and you can’t eat beef jerky for dinner?
Don’t Call Me Chicken!
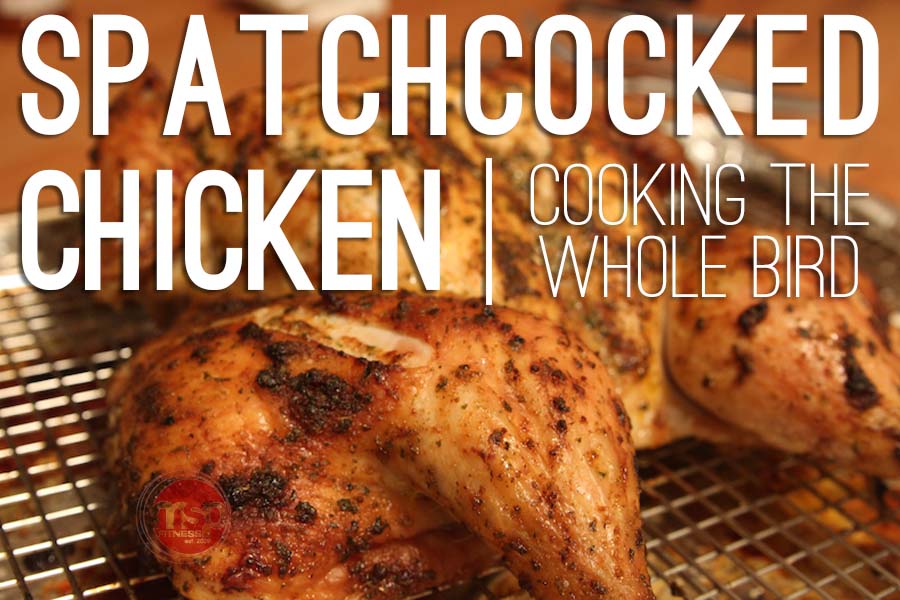
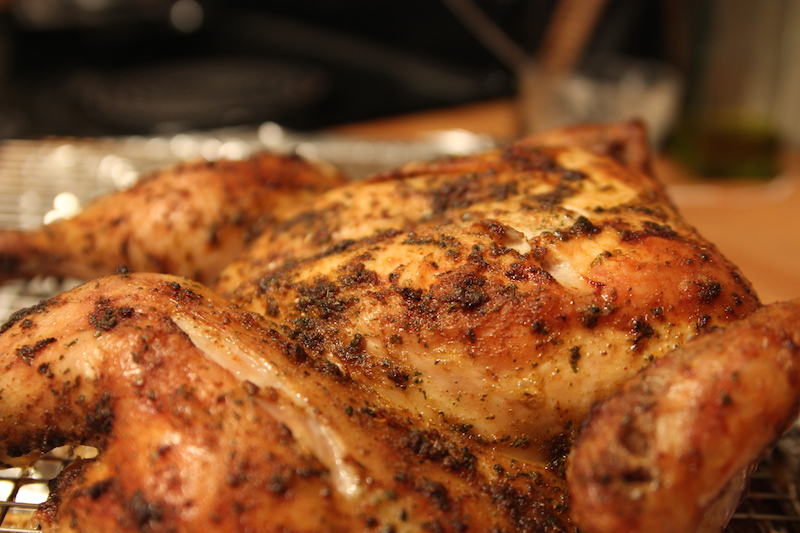
Today’s recipe is for Crispy Spatchcocked Chicken. Arguably the greatest culinary word ever invented, spatchcocking (yes that’s a verb) is the process of splitting a chicken, or other small bird to minimize cooking time and develop uniform flavor and texture across the fowl’s various cuts of meat. If you’ve never worked with a whole chicken, or don’t particularly consider yourself kitchen savvy, don’t worry! All you need to do is follow along as we go step by step through preparing (and storing!) this delicious recipe.
Crispy Spatchcocked Chicken | How to Cook the Whole Bird
 Tools You’ll Need:
Cutting board
Kitchen shears
Paper towels
Pastry brush
Baking sheet
Oven safe wire rack (optional – see below)
Aluminum foil
Meat thermometer
Ingredients:
1x 3-4 lb whole chicken (sometimes labeled as young chicken or fryer)
¼ cup melted butter or fat
1 tsp garlic powder
1 tsp smoked paprika (regular paprika will do)
1-2 tablespoons Kosher Salt (while kosher is preferred, sea salt will work in a pinch)
Directions – Time for Bird Surgery:
- Unwrap the thawed chicken and pat it dry using the paper towels, you’ll want a bird with dry skin so be thorough here. Look inside the cavity (big opening at the bottom of the chicken, between the legs) and remove the contents or package. Your chicken may or may not come with the neck and some internal organs. You can keep these for other recipes like homemade stock or a favorite of mine, fried chicken livers! You can also discard with no shame.
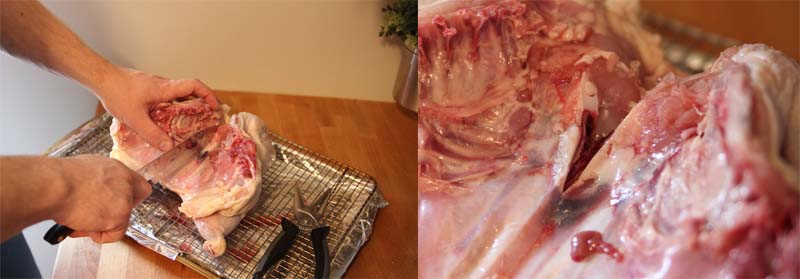
- You are ready to spatchcock! Place the bird breast side down and starting at the tail, use kitchen shears to remove the spine, cutting through the ribs on each side. Things will crunch, but if you’re staying close to the spine, your shears will move along nicely.
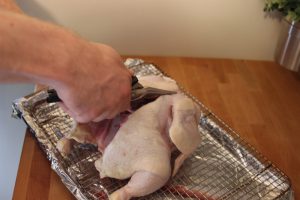 If you do get stuck or caught up, flip the bird and try the same technique starting at the neck. Discard the spine (or save it for homemade stock).
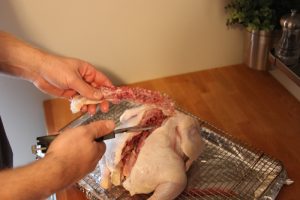
- Before you can lay the bird flat, you’ll need to use a kitchen knife or the shears to cut an incision in along the back of the breast bone.
 With paper towels, pat dry the parts of the chicken you could not access previously. Then, use both hands to flatten the chicken.
 - Flipping the chicken, you’ll want to finish the hands on portion of the recipe by tucking the wings behind the breast so they don’t burn.
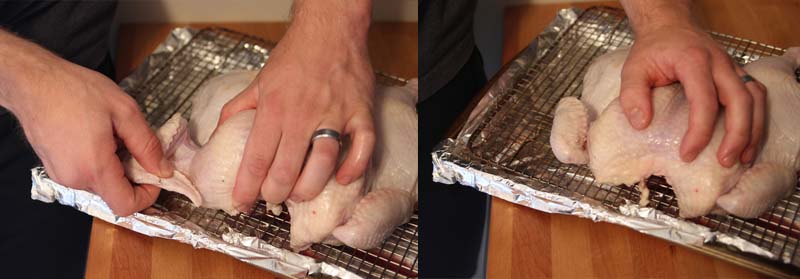
- Next, make some small incisions in the skin of the breast and thighs.
- Taking the melted butter, add the powdered garlic and smoked paprika, mixing thoroughly with the pastry brush.
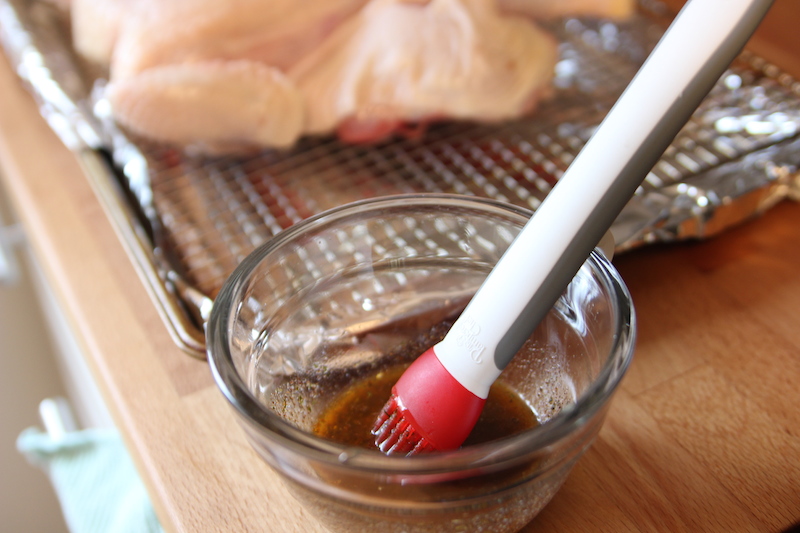
- Butter up the bird inside and out! Using your hands to lift the skin, brush the flavoring directly onto the skin, but also under the skin at the points you made incisions at. Cover completely.
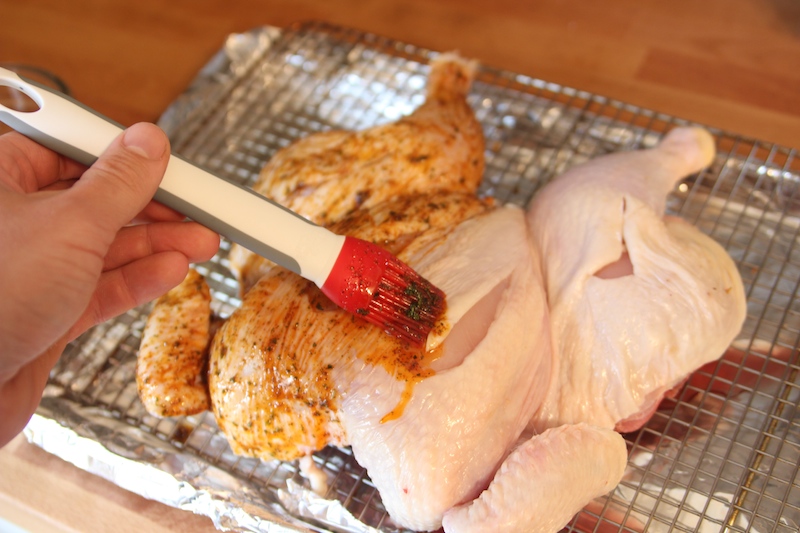 Next, sprinkle with kosher salt, covering the exposed skin.
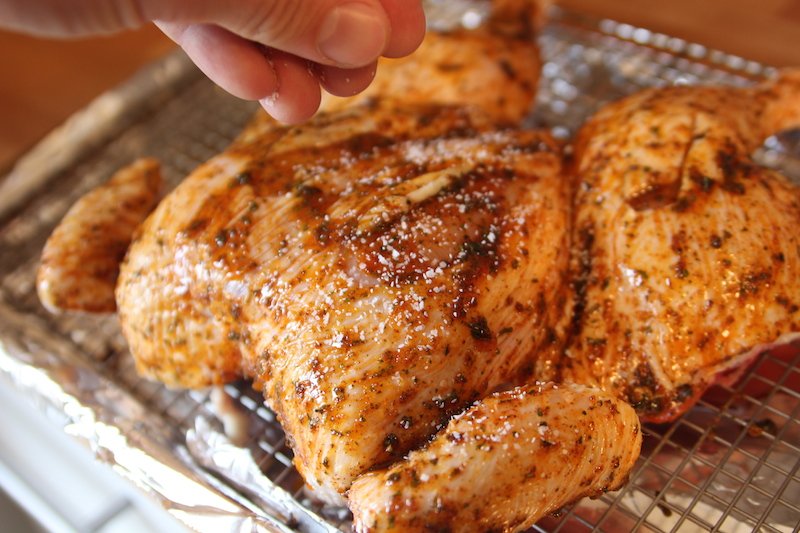
-

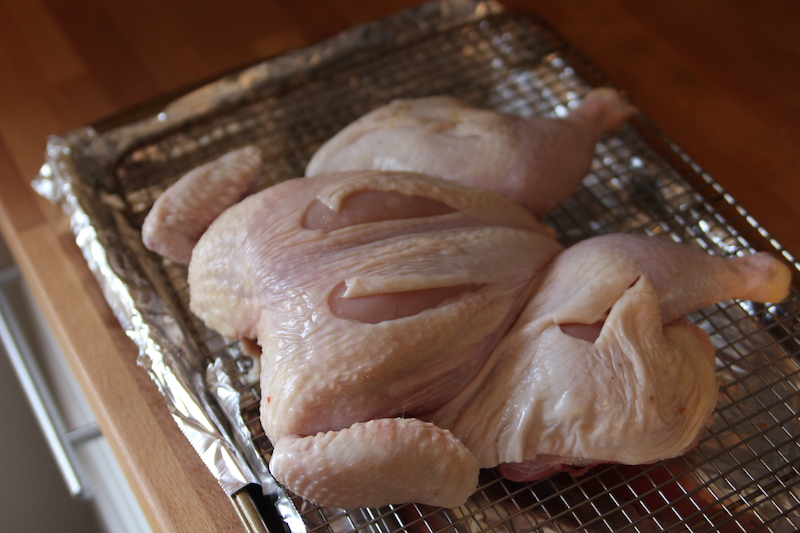
(credit: http://www.saveur.com/gallery/Foil-Roasting-Rack-Trick)
At this point, the bird is ready for the oven! Place the chicken on a wire rack set into a baking sheet lined with aluminum foil. Now if you don’t have a wire rack, you can make your own by rolling up thin lengths of foil and placing the bird on those (pictured right). This will provide the same service as the wire rack in keeping your meal out of it’s own juices, equating to crispy, delicious chicken skin.
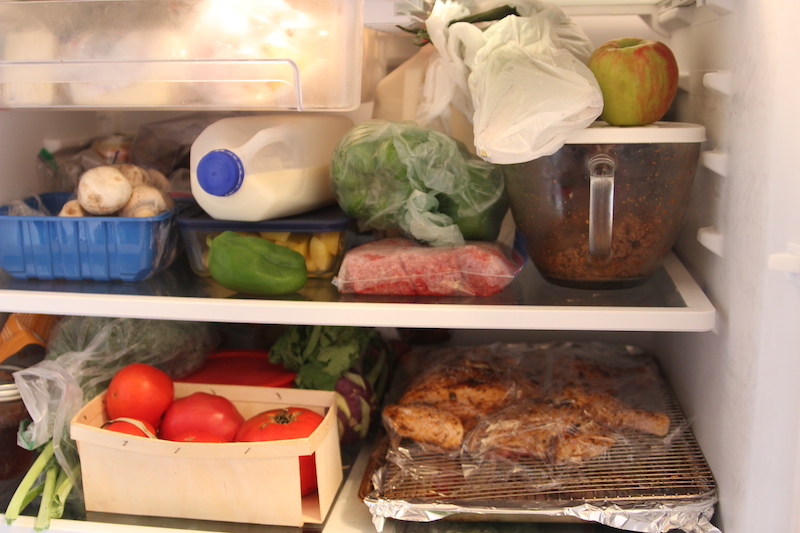
- If you aren’t ready to eat, cover in plastic wrap and put the chicken in the refrigerator until cooking time. This is a great option for folks with busy work schedules or anyone looking to shave a little time off their dinner prep. Simply pick up at the next step when you’re about 60-75min from table time. Chicken will keep prepped like this in the refrigerator for 2 days.
- It’s roasting time! In an oven set to 425°F, place the chicken in the top third of your oven’s available rack heights. This puts the bird well above the heating element on the bottom of the oven, yet far enough from the top that air can still flow all around your heavenly hen. Cook for 45min or until the meat reaches 165°F measured by an instant read thermometer.
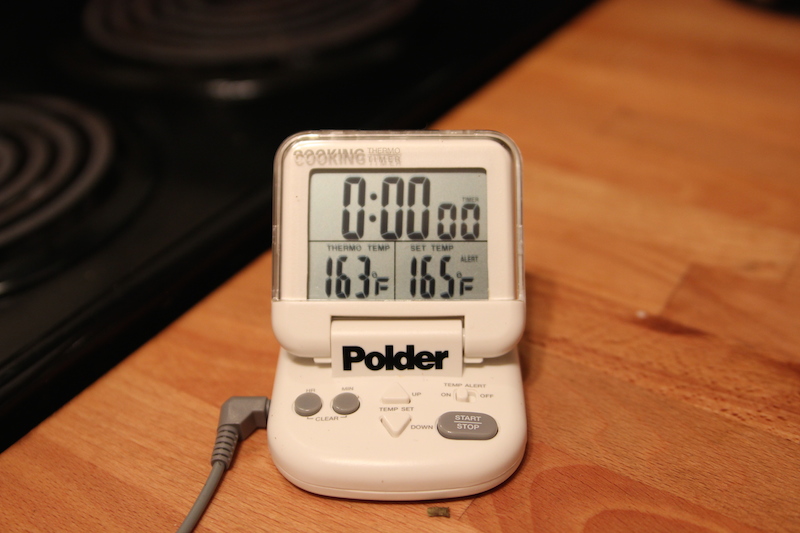
Polder Instant Read Thermometer / Timer
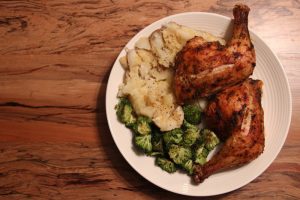
- Let the meat rest at room temperature for 5-10 minutes before carving. Divide up who wants dark meat and who wants white and GO TO TOWN! Don’t be shy, use your hands!

 If you are in the Minneapolis / Twin Cities / St. Louis Park area of Minnesota and are looking for a training environment that’s focused on longterm health, MSP Fitness is the gym for YOU! No fads, no gimmicks, no BS! We’ve been applying simple, yet effective training and lifestyle principles since 2009 making our clients stronger and healthier in the process. Come see what people are talking about and CONTACT US TODAY!

Don’t Take Our Word For It… Hear What Our Members Have to Say!
"Michael, Van, & Taylor provide incredible instruction. I've learned more about strength training and body mechanics in 6 months than in my previous 20 years of organized athletics."
"My favorite thing about being a MSP Fitness member is that it’s made training fun. I’m genuinely excited every day I walk through the door."